FIX Lower Back Pain (5 Easy Steps)
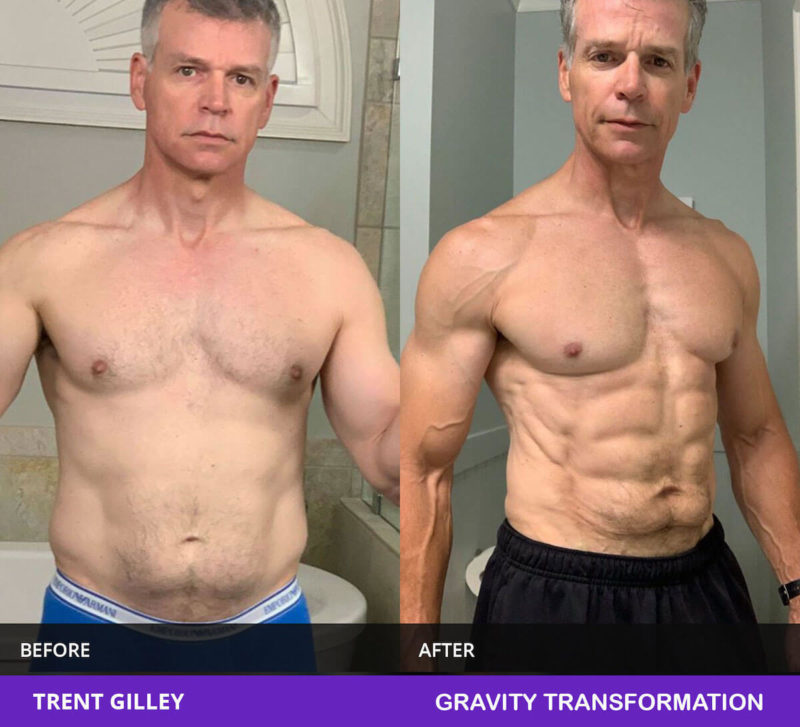
Check out my client Trent’s muscle transformation below!
Learn how to fix lower back pain fast by following only 5 easy steps. You’ll instantly feel relief by following this corrective routine. Rest assured, these are the best exercises and stretches to fix lower back pain and rehab the spine at home.
Steps to Back Pain Recovery
Whether you’ve bent down the wrong way, lifted something very heavy off the floor, or you’ve just been struggling with nagging lower back pain for a while now, there are things you can do to speed up your recovery and quickly relieve and fix your back pain.
But if you don’t do anything about it and just hope for it to heal on its own, there’s a good chance that you’ll just re-injure yourself again because you’re not addressing the cause of the problem.
That’s a significant issue because when you frequently have pain in your lower back, you can’t work, sleep, or work out properly.
So, I want to go over the 5 key steps you can take to quickly recover from lower back pain and prevent it from happening again in the future.
Things to Avoid During Recovery
#1: Overworking your body
When you start feeling pain and think you’ve injured your back, the first step towards recovery is setting up an ideal environment for your body to repair itself.
All too often, we’ll be working out, doing yard work, or just lifting something off the ground. We’ll start to feel that tightness in our lower back, but instead of listening to our body, we try to push through it.
This is a bad idea because we all know that doing one more set of squats or shoveling more snow isn’t worth it. In fact, it’ll just make your injury worse. Not to mention, it’ll take you even longer to recover.
#2: Stretching Immediately After an Injury
Stretching has its place in the recovery process, but it shouldn’t be done right after an injury. This is because there’s a high chance that your back pain stems from a muscular strain caused by overstretching or hyperextending your back muscles.
If you’re feeling some pain from overstretching your muscles, the last thing you want to do is stretch them even further.
Ways to Promote Recovery
Stop the activity that is causing the pain and start applying ice to the injured area every 2 hours for 20 minutes to help reduce inflammation.
You’ll also want to get somewhere where you can rest, but you must be doing it on a firm surface when lying down and resting.
One of the worst things you can do for your back, especially after getting an injury, is to sink into a super soft bed.
A soft mattress doesn’t provide much support, so your upper back and hips will sink down into the mattress, causing your spine to curve and hyperextend, leading to more pain, making it harder to heal.
So make sure you lay down on a firm or at least a medium-firm surface, and you may even want to try resting on the floor.
When you lay your back on the floor or a similar hard surface, your body can’t sink down. Your spine is put into a neutral position that is ideal for recovery.
Follow an Anti-Inflammatory Diet
While resting, icing, and taking it easy for a couple of days, you can begin with eating an anti-inflammatory diet. And this is critical for recovery if you continuously have nagging lower back pain and especially if you’ve recently had an injury.
Most people only focus on what exercises and stretches… However, to speed up recovery, your diet should consist of whole, unprocessed foods.
You should eliminate refined carbohydrates, fried foods, soda, sugar, high fructose corn syrup, alcohol, and processed meat. All these foods will contribute to inflammation. The longer it takes to reduce the inflammation, the longer it’ll take to heal.

Natural foods have the exact opposite effect, and some may even help lower inflammation. For example, fruit like kiwi and pineapple contains bromelain, a protein-digesting enzyme known for its anti-inflammatory effects.
Foods high in omega 3 like salmon, walnuts, flaxseeds, and chia seeds are all excellent to eat as well because omega 3 has been shown to help prevent and reduce excessive inflammation.
You’ll also obviously want to eat a lot of greens, as well as good natural sources of protein and fat.
To put it simply, don’t go crazy overcomplicating your diet. Just eliminate all processed foods and only eat whole natural foods to lower inflammation to speed up recovery and fix your back pain.
Foam Roll the Glutes, Hamstrings and Hip Flexors
Now the next step in fixing back pain is to start foam rolling and stretching. But remember, you should let at least 48 to 72 hours pass after your injury before you begin this step.
When foam rolling, many people make the mistake of foam rolling their lower backs directly.
This is a mistake because when foam rolling the lower back, you can easily allow your upper body and hips to sink down, causing hyperextension of the spine.
On top of that, the lower back muscles are rarely the cause of the lower back pain. Instead, for many people, the problem stems from their hip flexors, glutes, and hamstrings.
For the glutes:
To begin foam rolling the glutes: sit down on the foam roller, then cross your ankle over your knee, tilting your body towards the same side that your bent knee is pointing towards.
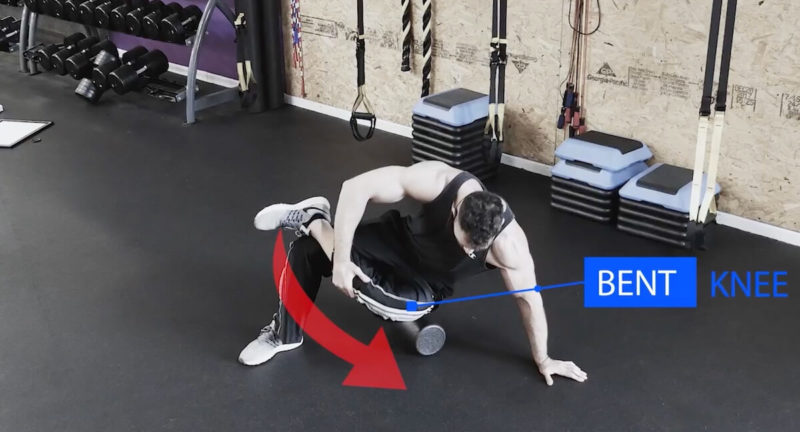
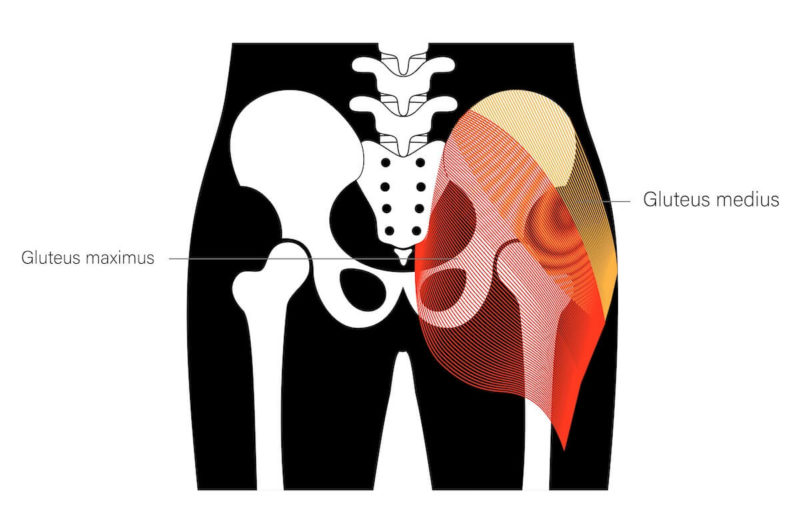
The more you tilt to the side, the more you’ll target the gluteus medius. The less you tilt, the more you’ll target your gluteus maximus. Spend some time foam rolling both areas.
Whenever you find tender spots on any foam rolling movement, slow down and work on those spots for 20 seconds before continuing.
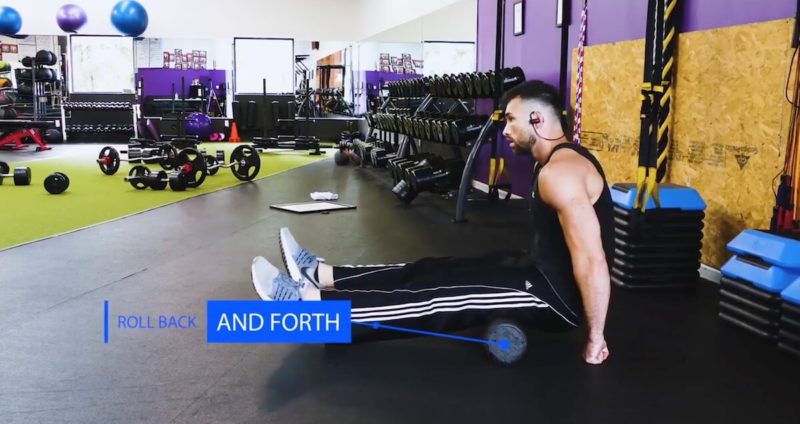
For the hamstrings:
Sit on the foam roller with your hands behind your back. Then, push and pull your hips back and forth to roll the hamstrings out.
If you can handle the movement with both legs on the roller, then you can try to bend one knee and focus on only rolling out one leg at a time to put more pressure on that hamstring.
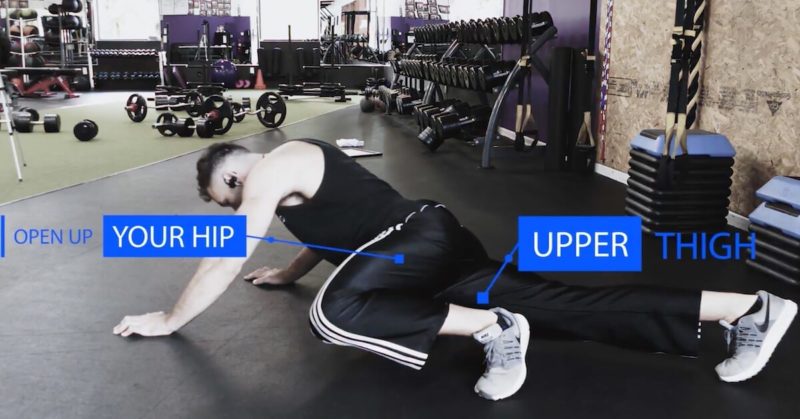
For the hip flexors:
To roll out the hip flexors: lay down in a prone position, open up one hip, bend the knee, and lay your opposite upper thigh on the edge of the foam roller. With short back and forth motions, roll out the hip flexor once again, making sure to stop and focus on tender areas for 20 seconds at a time.
Keep in mind if any of these cause anything more than very minor discomfort for your lower back, then don’t do it yet. But in total, spend about 10 to 15 minutes every other day going through these foam rolling movements.
Stretches to Fix Back Pain
After you foam roll, you’ll want to move to the stretches. Stretching can help big time.
Many people with tight hamstrings repeatedly injure their lower backs, not realizing that their hamstrings cause the problem.
When your hamstrings are too tight, they pull on the pelvis, which pulls on the spine.
If you sit a lot at work or throughout the day, your hamstrings and hip flexors both get tighter. Tight hip flexors cause lower back pain.
The Single Knee to Chest Stretch
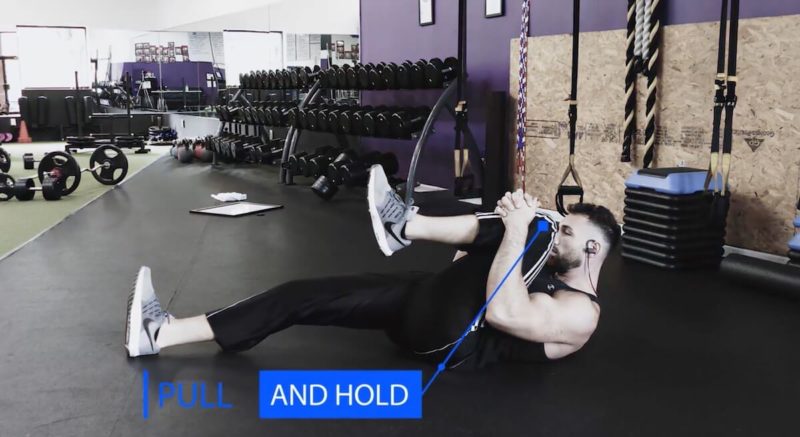
We do want to take the stretching slow at first. So for the first stretch: start by lying on your back, pulling one knee into your chest, and hold that position. If that doesn’t cause pain, try pulling both knees into your chest and holding that position…
The Piriformis Stretch
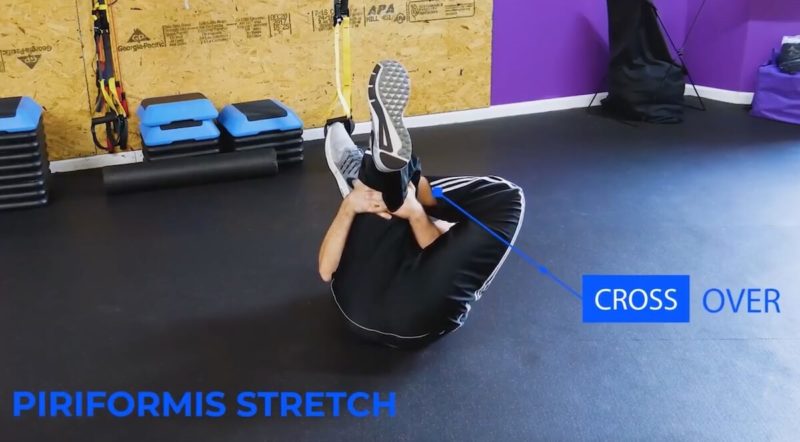
Next, you’ll want to perform a piriformis stretch by crossing one ankle over your knee, then laying back and pulling the knee that’s under your ankle towards your face.
The Cat-Cow Stretch
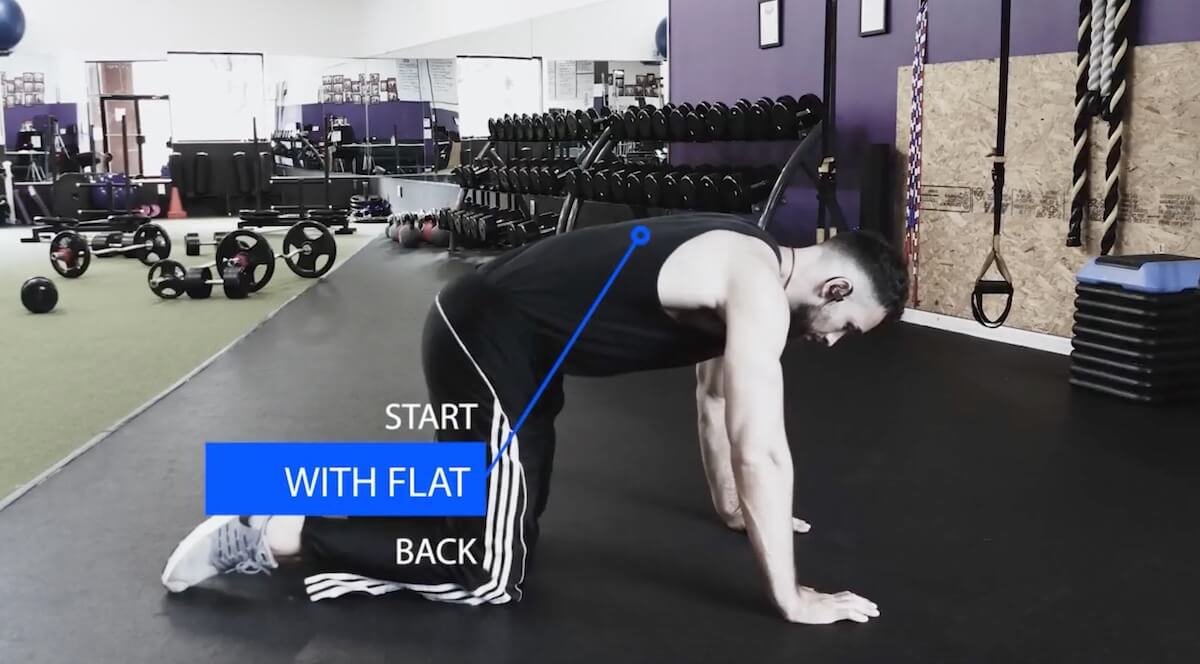
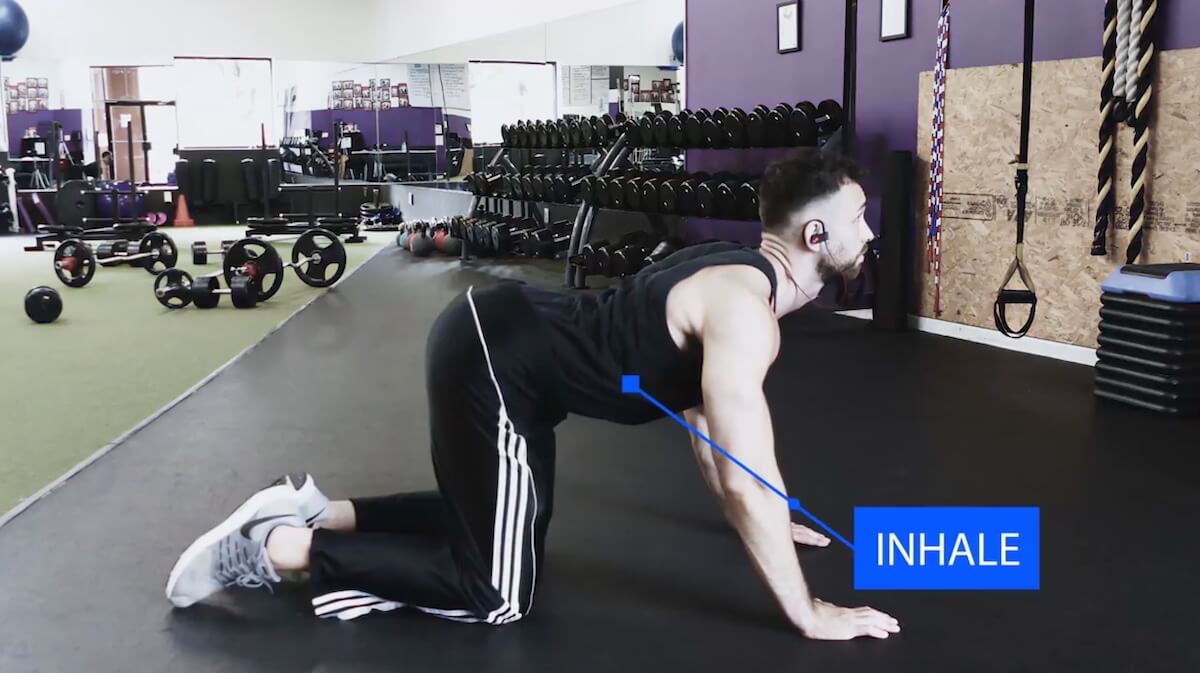
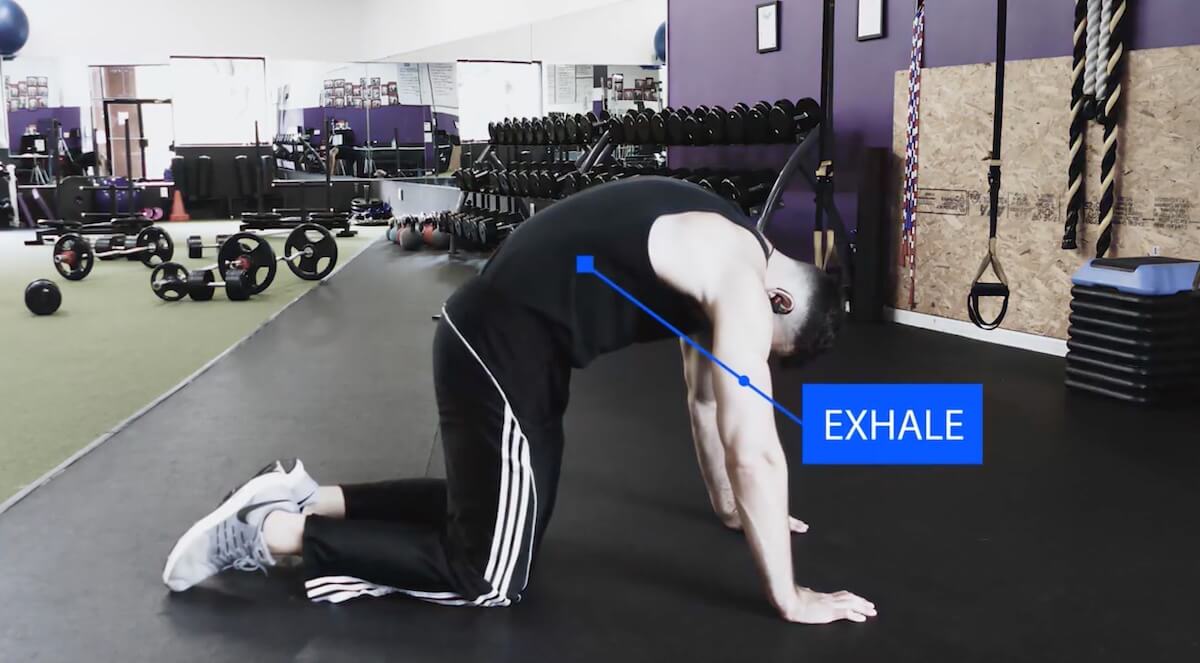
Another stretch you’ll want to do is the cat-cow stretch. Here you’ll start on all fours with a flat back. Then inhale as you tilt your pelvis back for the cow stretch and then exhale and tuck your tailbone towards your chest for the cat stretch. Then go back and forth.
The Sit and Reach
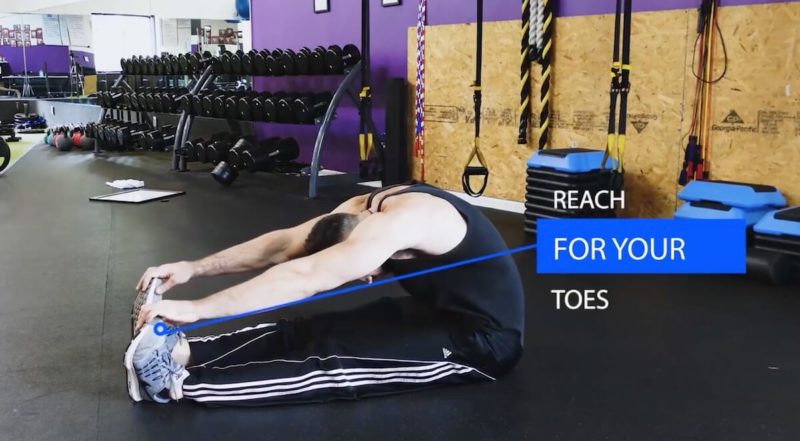
One of the best stretches you can do is the simple sit and reach, where you sit on the ground, put both feet out straight in front of you, and reach for your toes with your knees locked out. If that’s too tough right now, grab a towel, put it around your foot, lay back, and slowly pull your foot upwards with your knee locked out.
You can do all of these stretches daily, and you’ll want to hold each stretch for 20 seconds, release, and repeat for 3 to 6 rounds.
Strengthen the Core
Once you’re ready to start slowly working out again, move on to this step; just make sure that you save stretching for after your workouts or stretch on separate days. Don’t do it before your workouts.
But to prevent another lower back problem in the future, we’ll want to strengthen the glutes, the back muscles, and especially your core.
Your core is important because when your core is strong, it’ll support your spine, especially if you’re lifting something off the ground. On the other hand, if your core is weak, the weight will be transferred to your spine, increasing the chance of reinjury.
Core Strengthening Exercises
#1: The Tabletop Leg Press
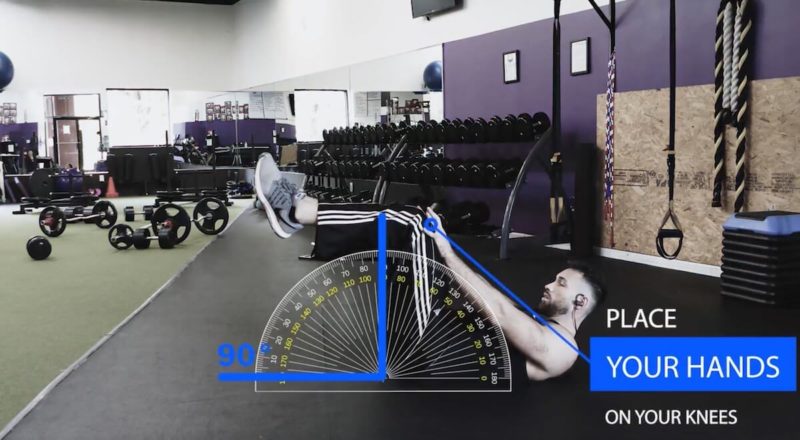
First, you can start slowly working on the core with an exercise known as the tabletop leg press.
This is set up by laying on your back, bending your knees at 90 degrees, and placing your hands on your knees. Then your goal is to simply crunch up a tiny bit and push your quads into your hands while simultaneously pressing them away. Hold the position for few seconds and repeat for reps.
#2: Bird Dog
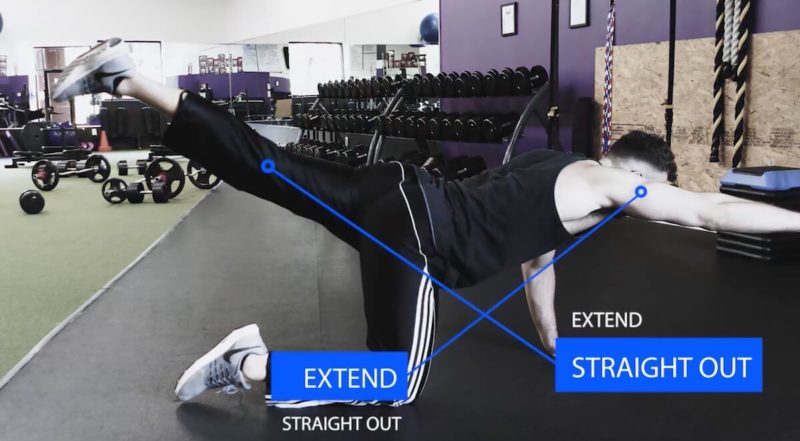
You can do a bird dog by getting on all fours, extending one arm and the opposite leg straight out, then returning. Repeat this for 30 seconds before switching to the other side.
#3: Glute Bridges
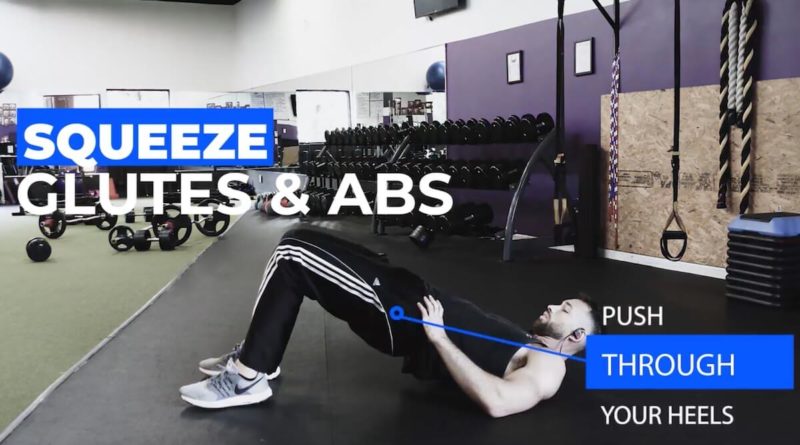
You can also perform some glute bridges by laying on your back, squeezing your glutes and abs, pushing through your heels to lift your hips until you create a straight line from your shoulders to your knees, then lower back down and repeat for reps.
Build New Habits
If you’re overweight…
First of all, if you’re overweight or your muscles are deconditioned, you’re going to continue risking future lower back injuries until you change that.
As I mentioned, if your core is weak, it won’t support your back, and if you’re overweight, your spine has to support all that extra weight all the time.
So make sure you’re eating right, and once you’re fully healed, make sure you start working out consistently.
Avoid Prolonged Sitting
Another daily habit you want to do your best to avoid is prolonged sitting.
If you have to stay seated for a long time, do your best to maintain good posture while sitting throughout the day. Taking simple steps like raising your monitor higher to eye level or simply sliding your chair in closer can help improve your daily posture.
Learn to Lift Correctly
If you injured your back lifting something off the ground, you should learn how to properly lift things off the ground.
When lifting anything, you don’t want to bend straight down at your back. Instead, pull your shoulder blades back, stick your chest out, focus on maintaining the natural curve in your spine as you bend your legs, and squat down to grab whatever it is that you’re lifting. Then continue pushing your chest out and keep your back flat as you lift up.
Get Enough Sleep
Sleep is another crucial factor. Every day you create microscopic tears in your back muscles just by supporting your trunk when you stand, walk and sit.
So getting enough quality sleep on a good mattress every night is vital for spinal health.
We already touched on the importance of having a firmer mattress. That doesn’t only apply while you are injured. You should continue sleeping on a mattress that’s at least medium-firm to prevent future lower back pain and optimize alignment and recovery while you sleep.
Also, do your best to sleep mostly on your back and side instead of your stomach. Sleeping on your stomach offers no support for your lower back.
Quit Smoking
Finally, if you smoke, protecting your lower back is another reason you have to quit. Why? Because nicotine restricts blood flow to the spine’s disks. Smoking also decreases the oxygen in the blood, which reduces the nutrients that can get to the muscles and tendons in the back.
Wrapping things up…
So that’s about it, guys. I really hope this has helped you out, and hopefully, you’ll experience fewer back problems in the future.
We’re currently running a challenge. It has helped my clients lose 20 pounds or 5 percent of their body fat in only 42 days. And I think it can really help you if you’re trying to lose some weight.
It comes with a customizable meal plan, a recipe book, a 42-day workout plan that can be adjusted if you have any issues. Best of all, it comes with an accountability coach who will be there to answer questions and guide you through the process.
To find out more, click the link below.
My passion for fitness began when I was 14 years old. I naturally fell in love with training and haven’t stopped since. At 18 years I acquired my first personal training certification from ACE after which I opened my first of 3 transformation studios in 2011. I love to share my knowledge through personal training, my online courses, and youtube channel now with over 3,000,000 subscribers! I can happily say that we've helped over 15,000 people get in great shape over the years. I'm always here for my customers so if you need help don't hesitate to send your questions to support@gravitychallenges.com

